Compatibility
For optimal compatibility with our mailbox accounts, it’s advisable to use the most recent version of Android on your smartphone or tablet. This ensures seamless synchronisation and incorporates the latest software updates, which can help prevent potential issues. We recommend regularly updating your Android smartphone and tablet to ensure that you have the latest features and security updates.
Before you start
Before beginning, ensure that you have the password for your email account. We previously sent you an email containing all the necessary information. If you’re unable to locate the email, please get in touch with us.
When setting up your devices, always choose IMAP to ensure that all of your devices synchronise with each other. This means that you’ll have access to all of your emails on all of your devices and in Webmail, and any changes you make (such as marking an email as read or deleting it) will be reflected across all devices. By using IMAP, you can enjoy a seamless email experience, no matter which device you’re using.
Step-by-step instructions
To set up your email account with the Gmail app on your Android smartphone or tablet, please follow these steps:
Step 1
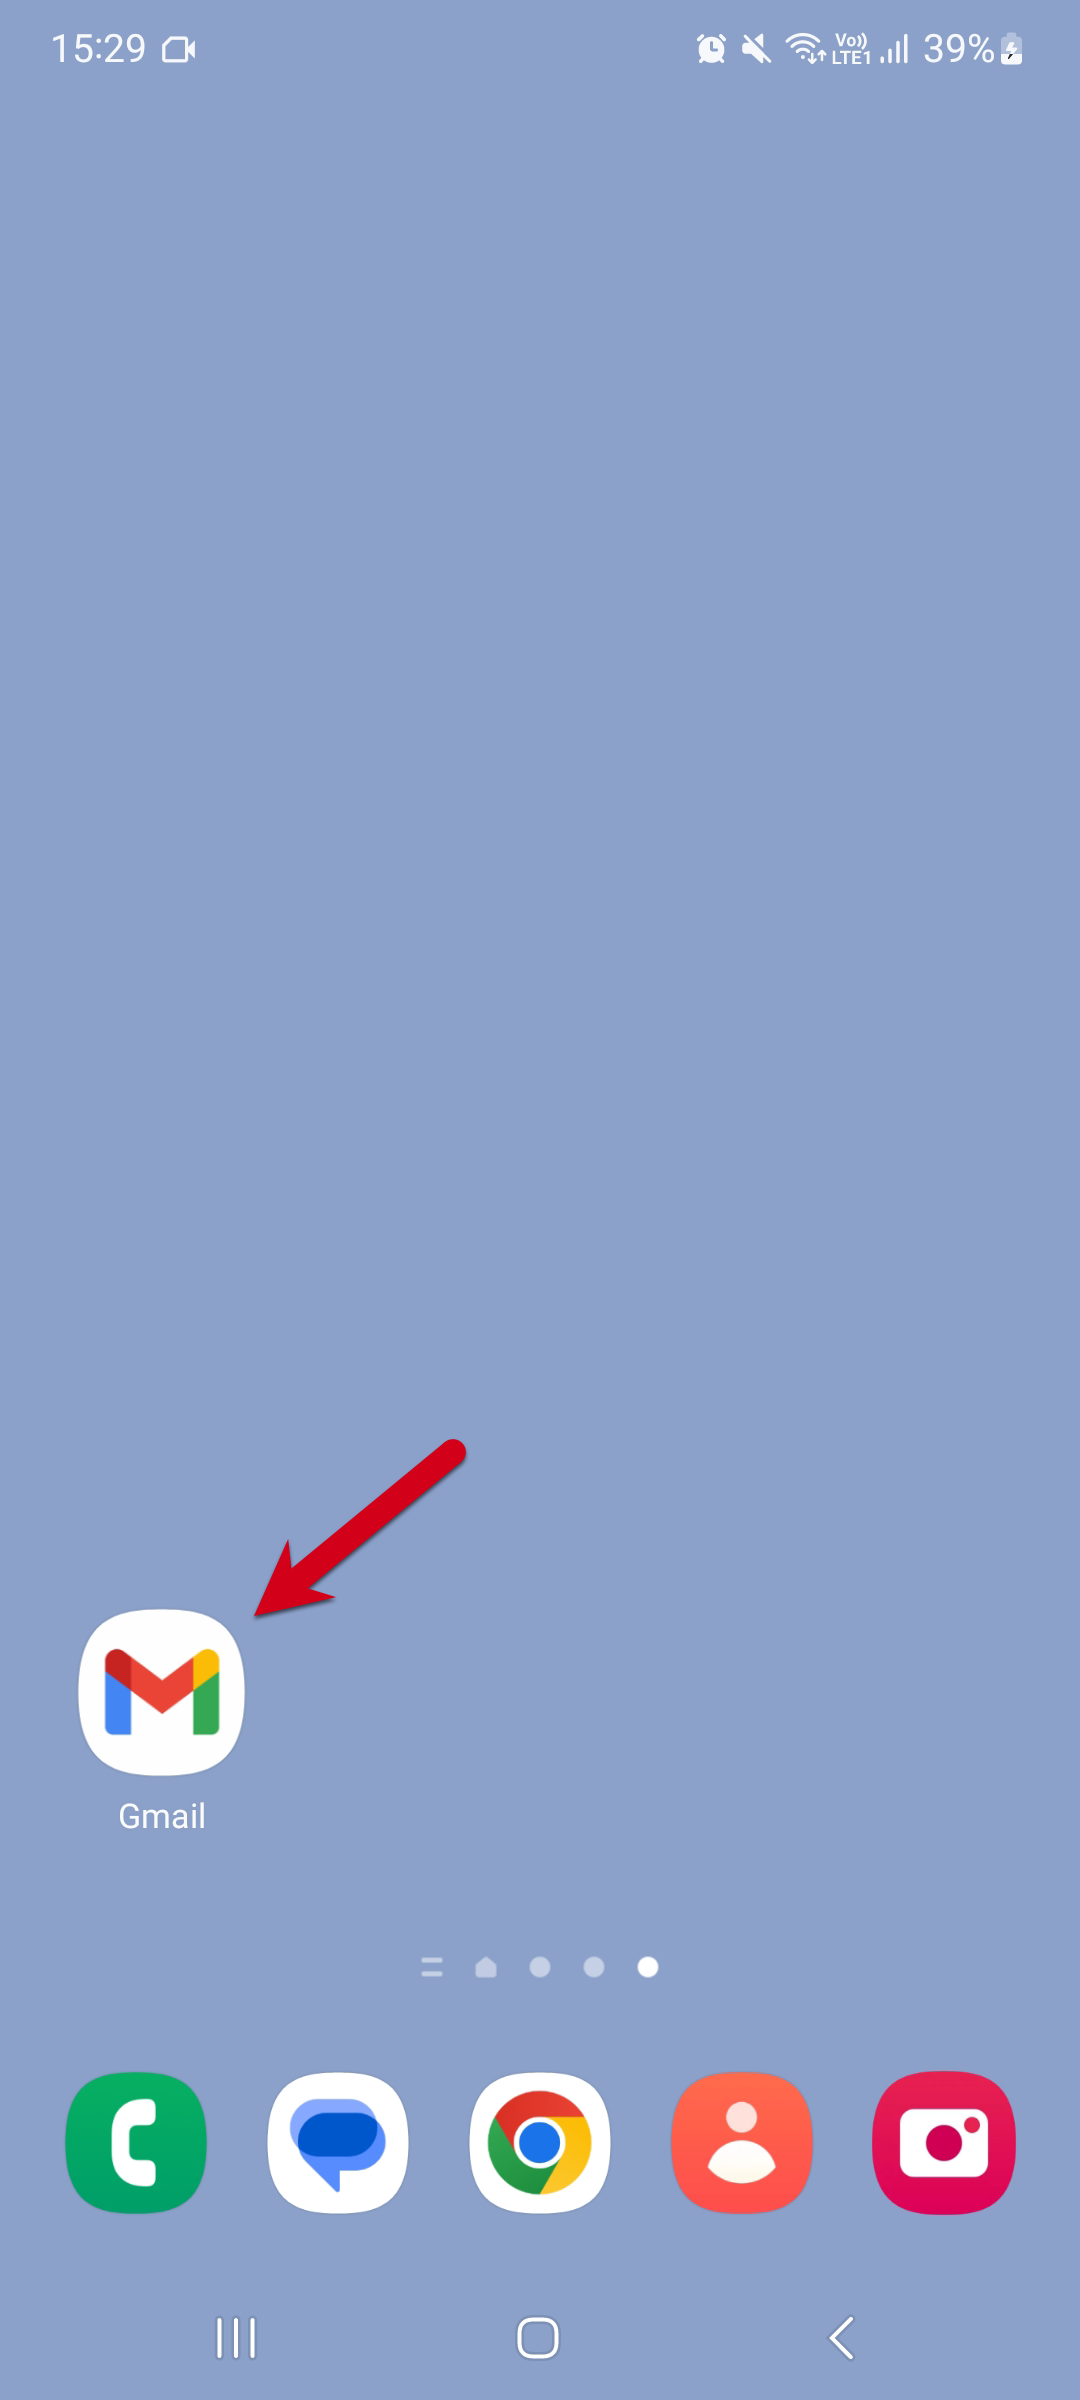
- Open the Gmail App.
Locate and tap the Gmail app icon on your Android device to open it.
Step 2
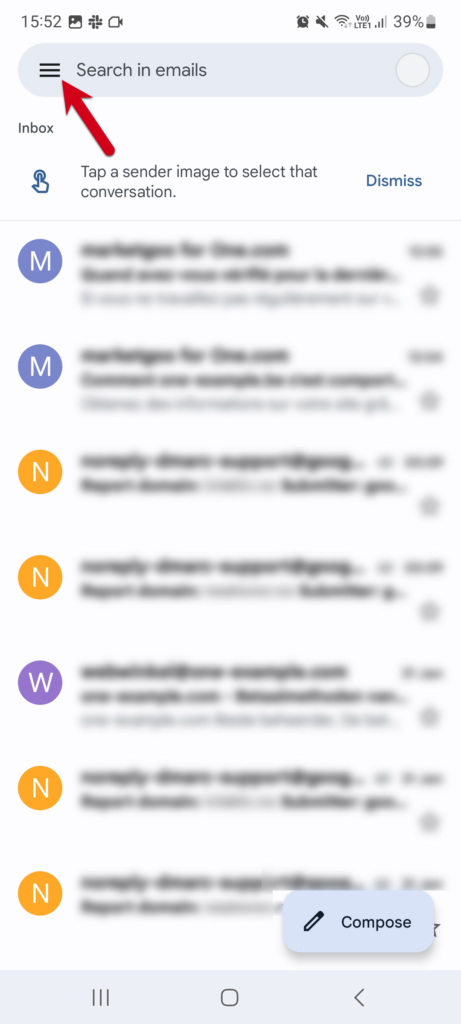
- Tap the Menu icon (three horizontal lines) in the top left corner of the Gmail app.
- Then, scroll down and select Settings from the menu.
Step 3
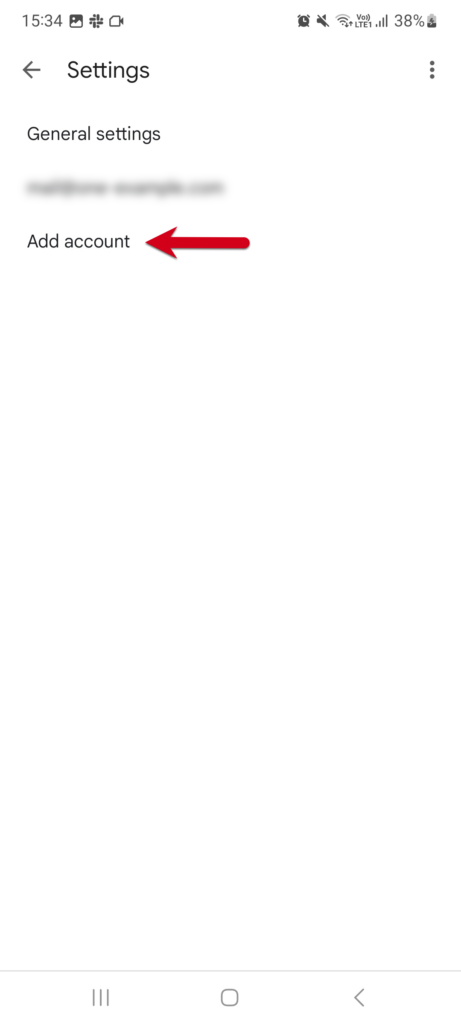
- In the Settings menu, tap Add account.
Step 4

- Choose Other from the list of email providers.
Step 5
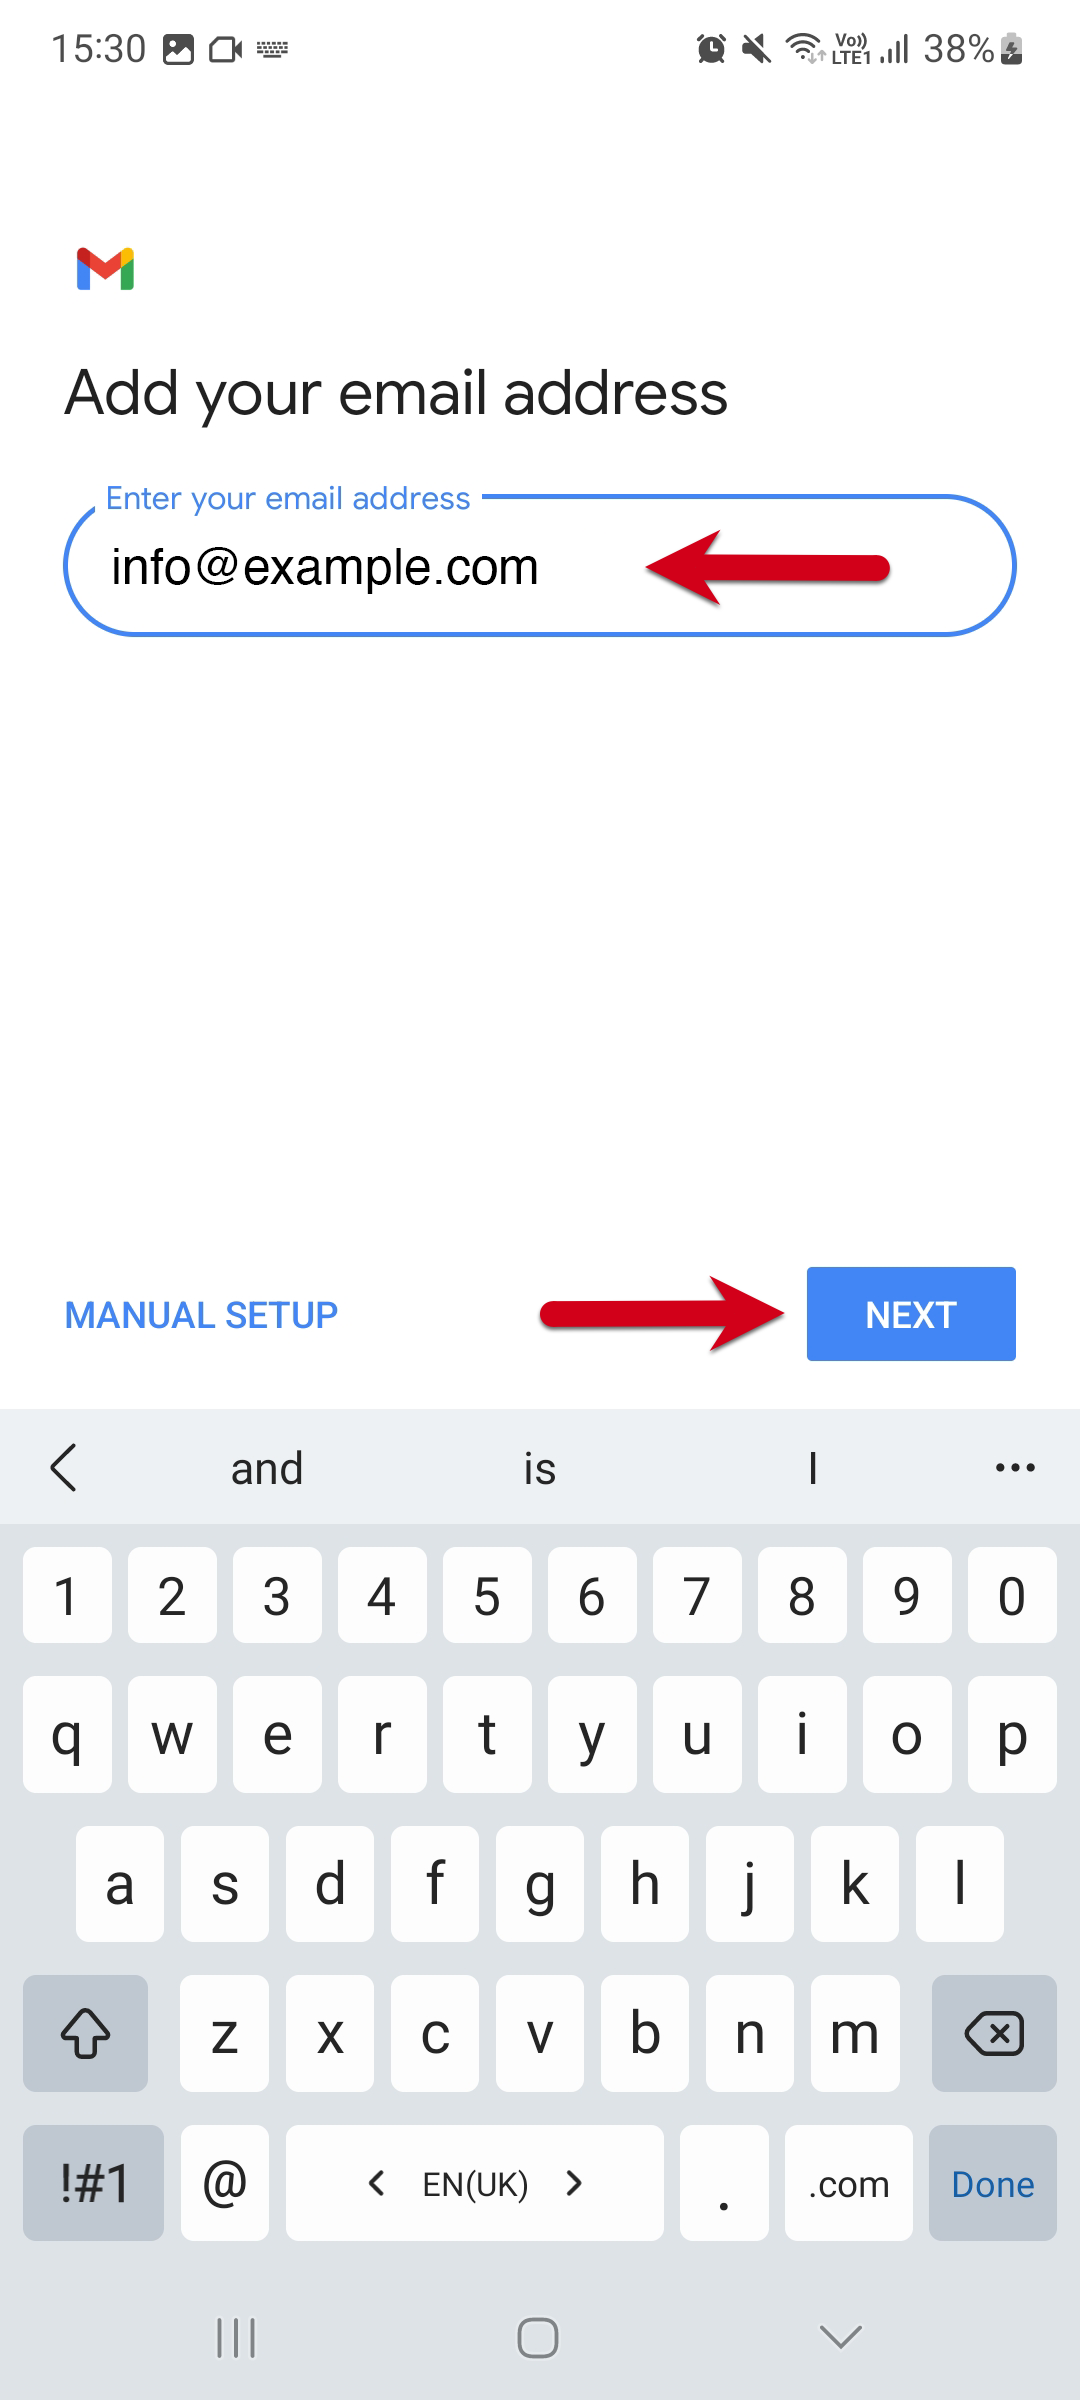
- Type in the email address for the account you want to add and tap Next.
Step 6
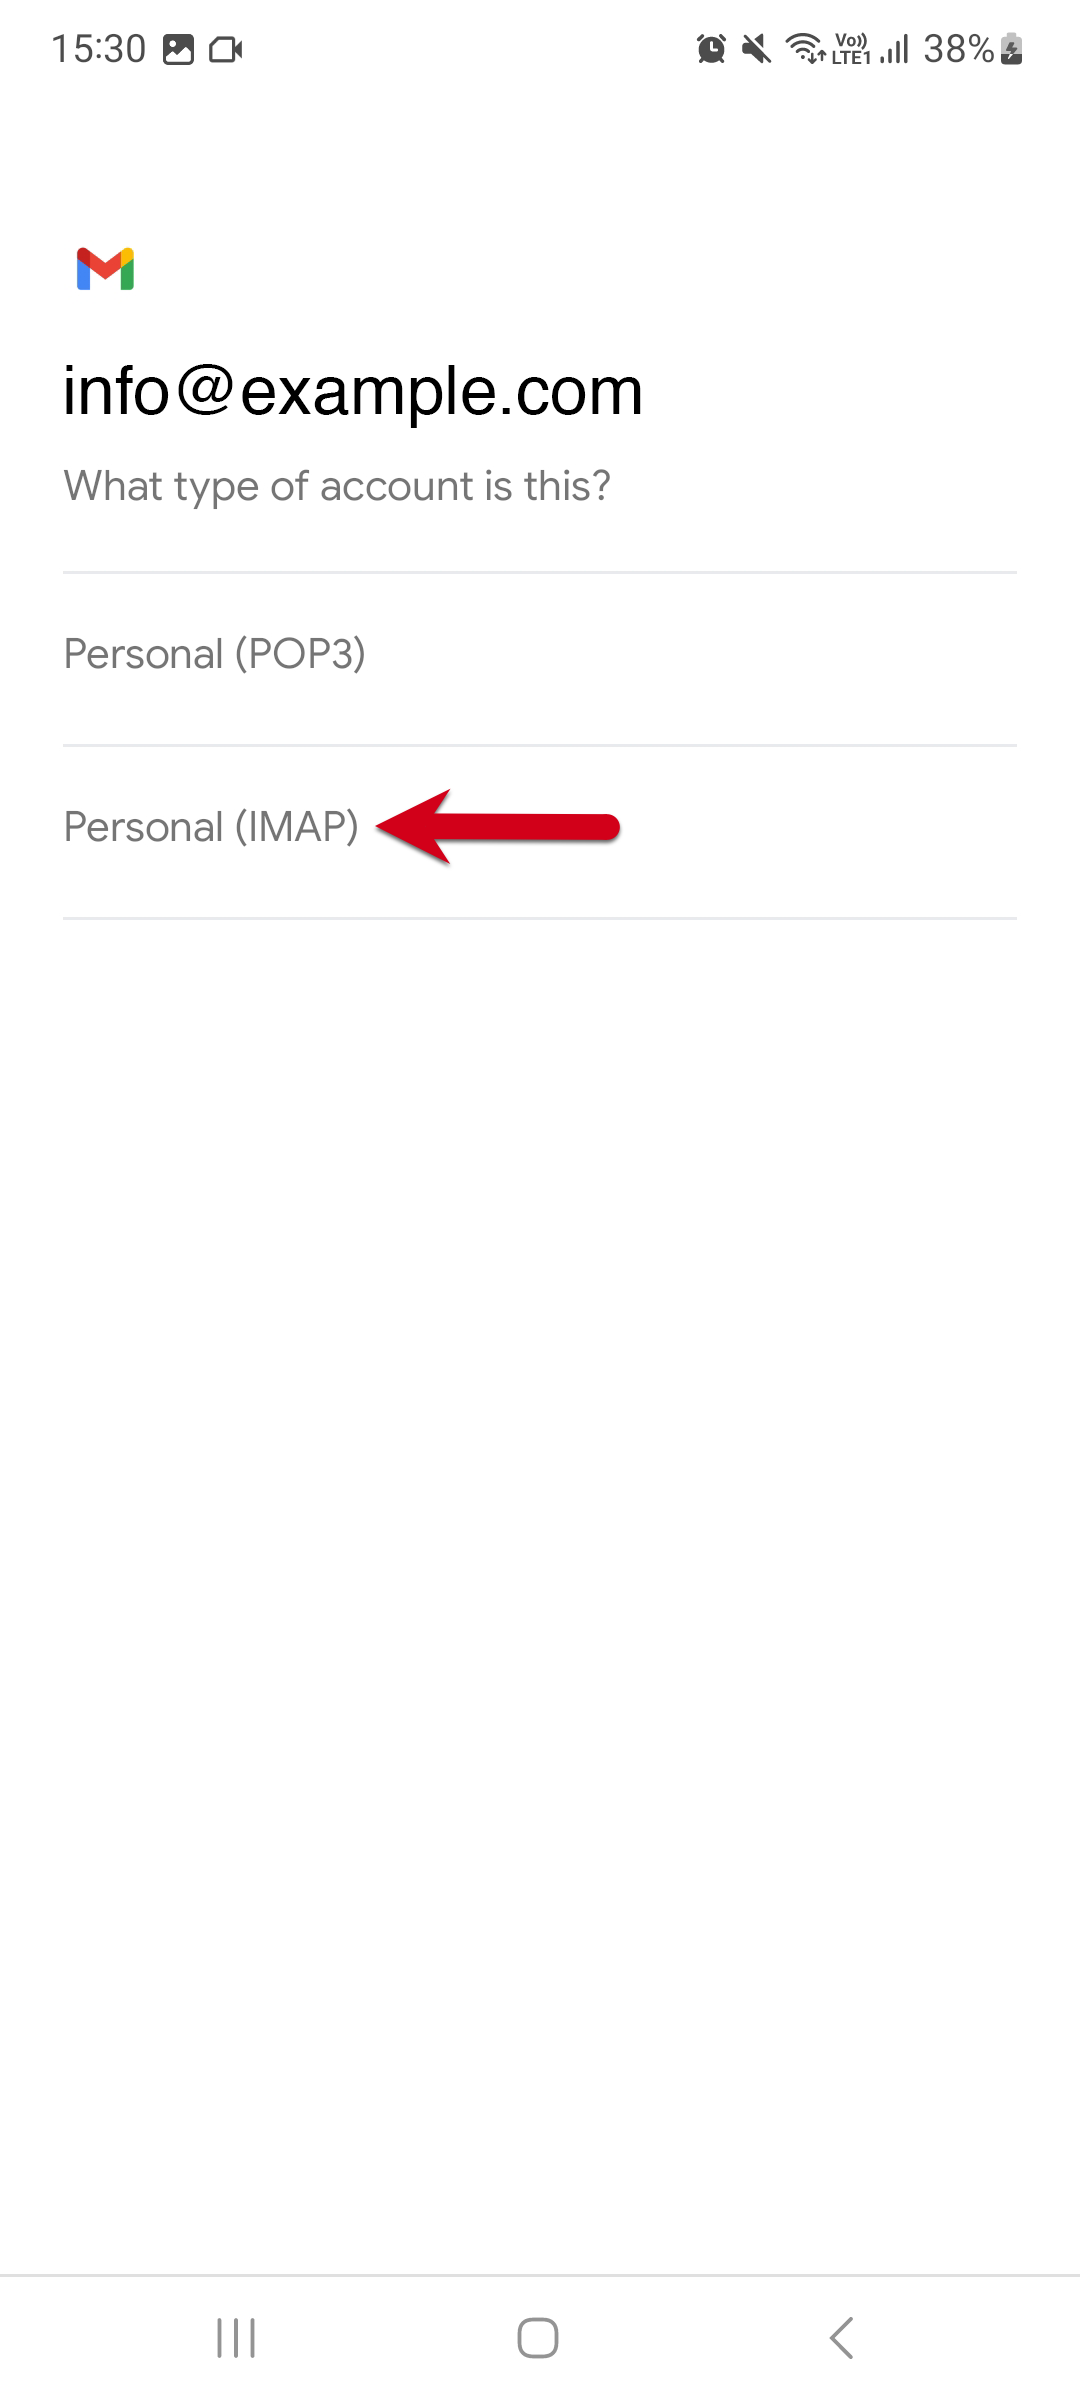
- Choose IMAP as the type of account.
Step 7
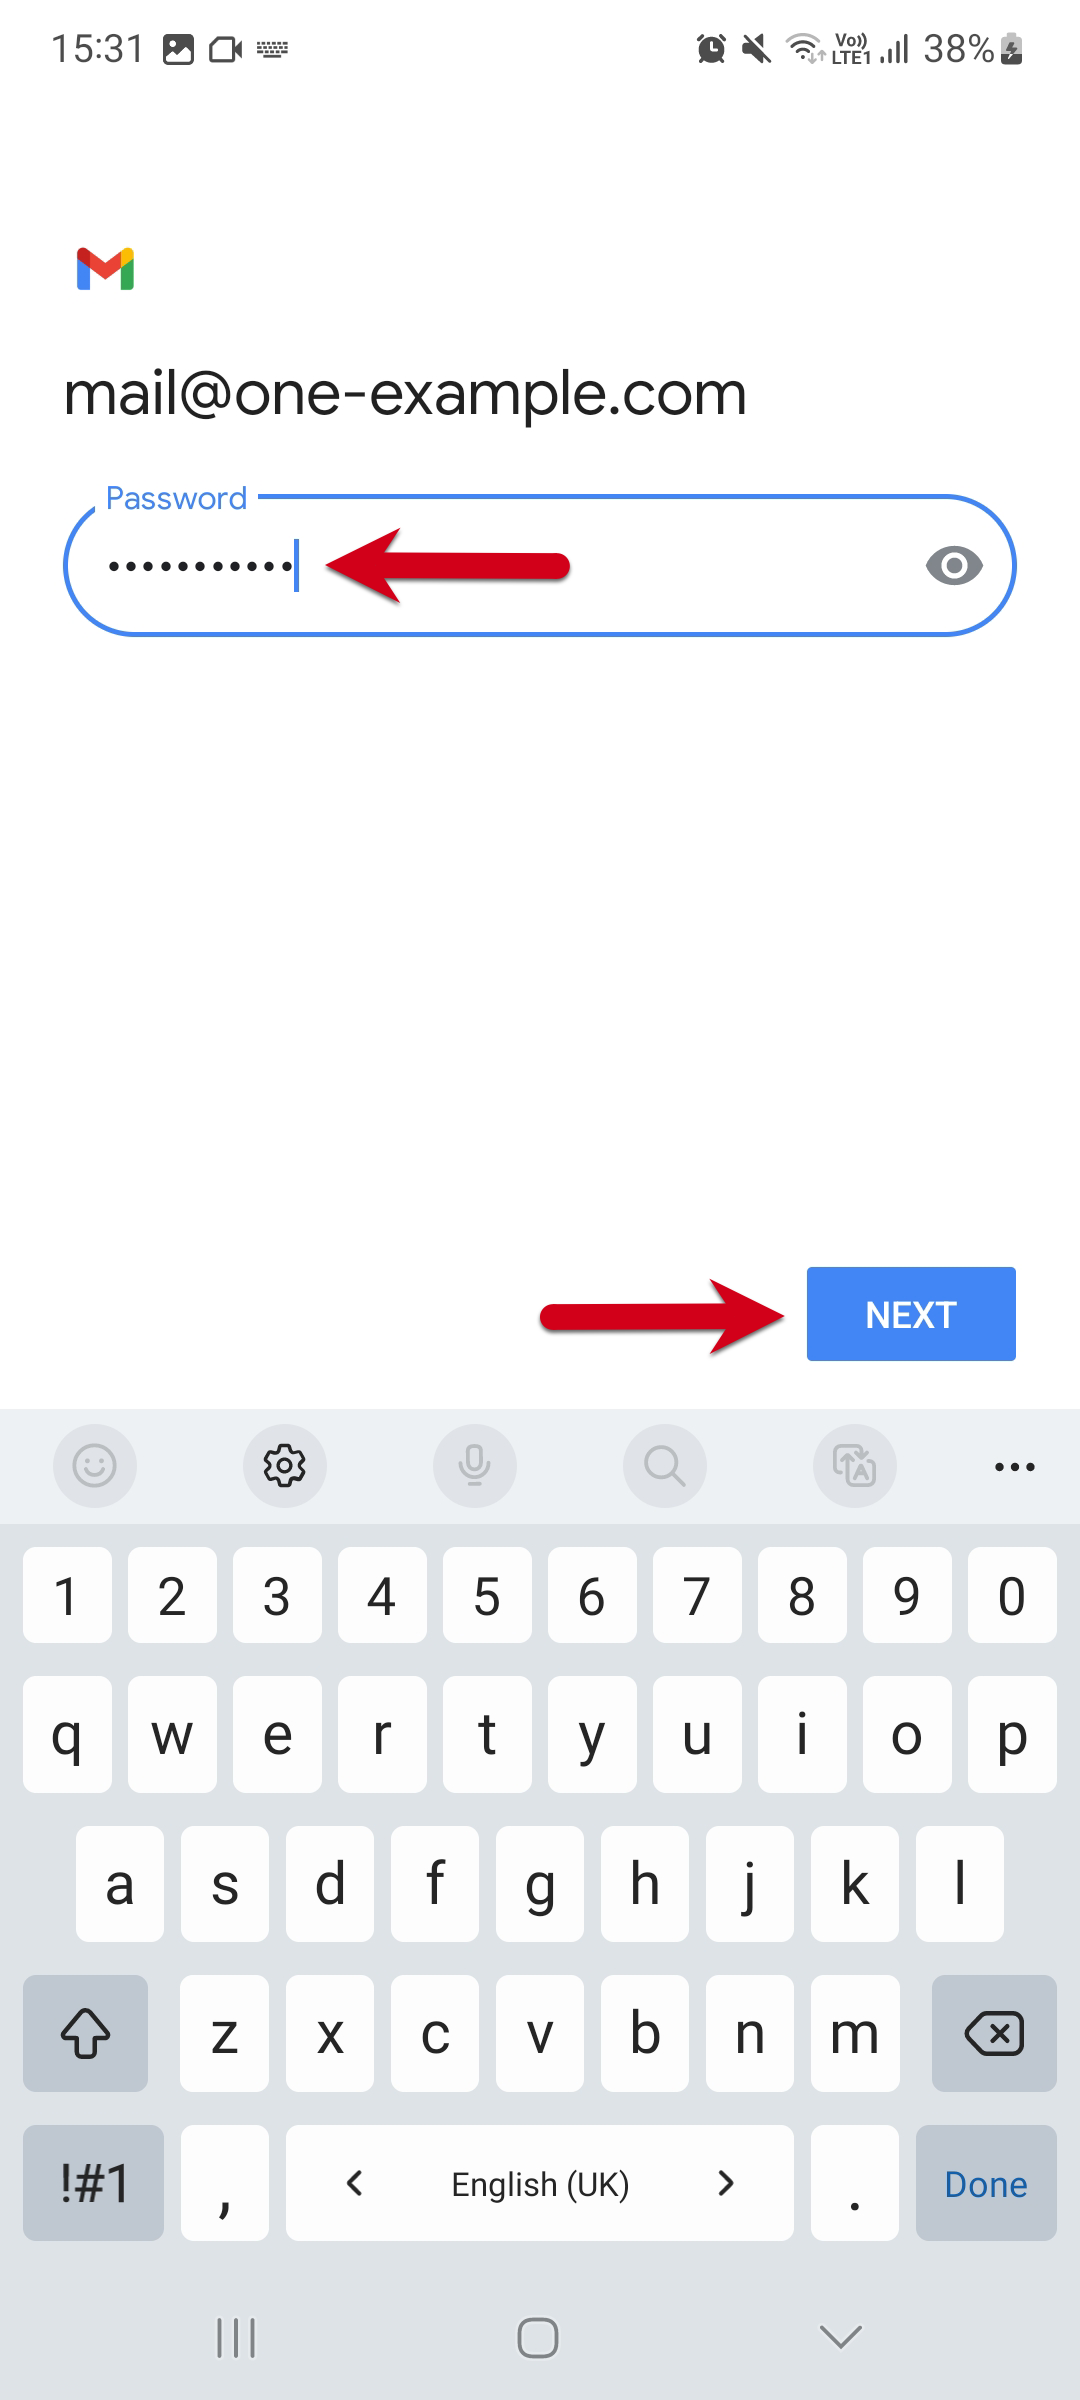
- Input the password for your email account and tap Next.
Step 8
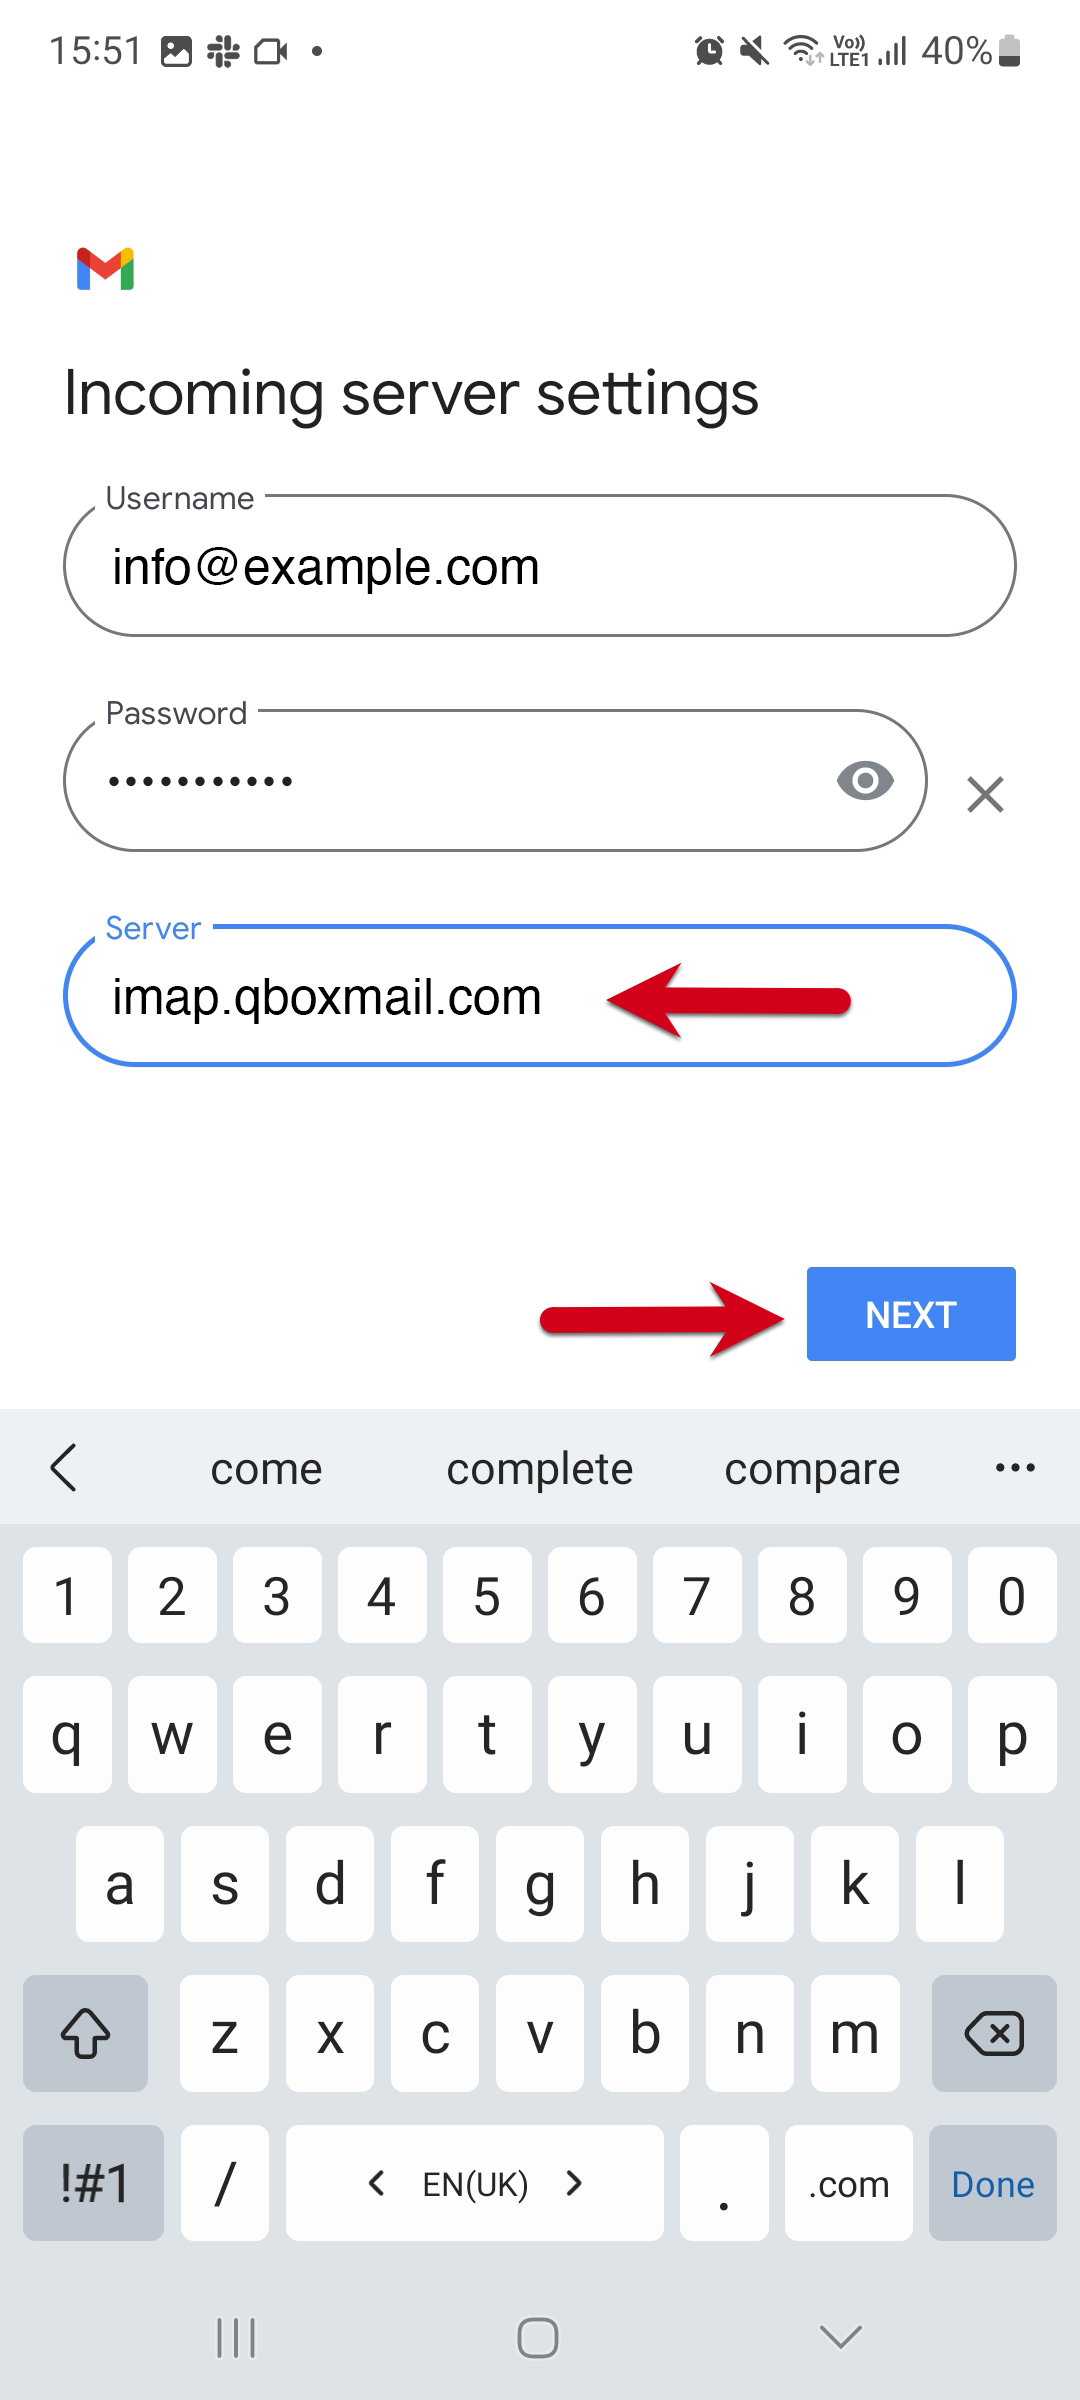
- Enter incoming server Host Name bij Server: imap.qboxmail.com
Step 9
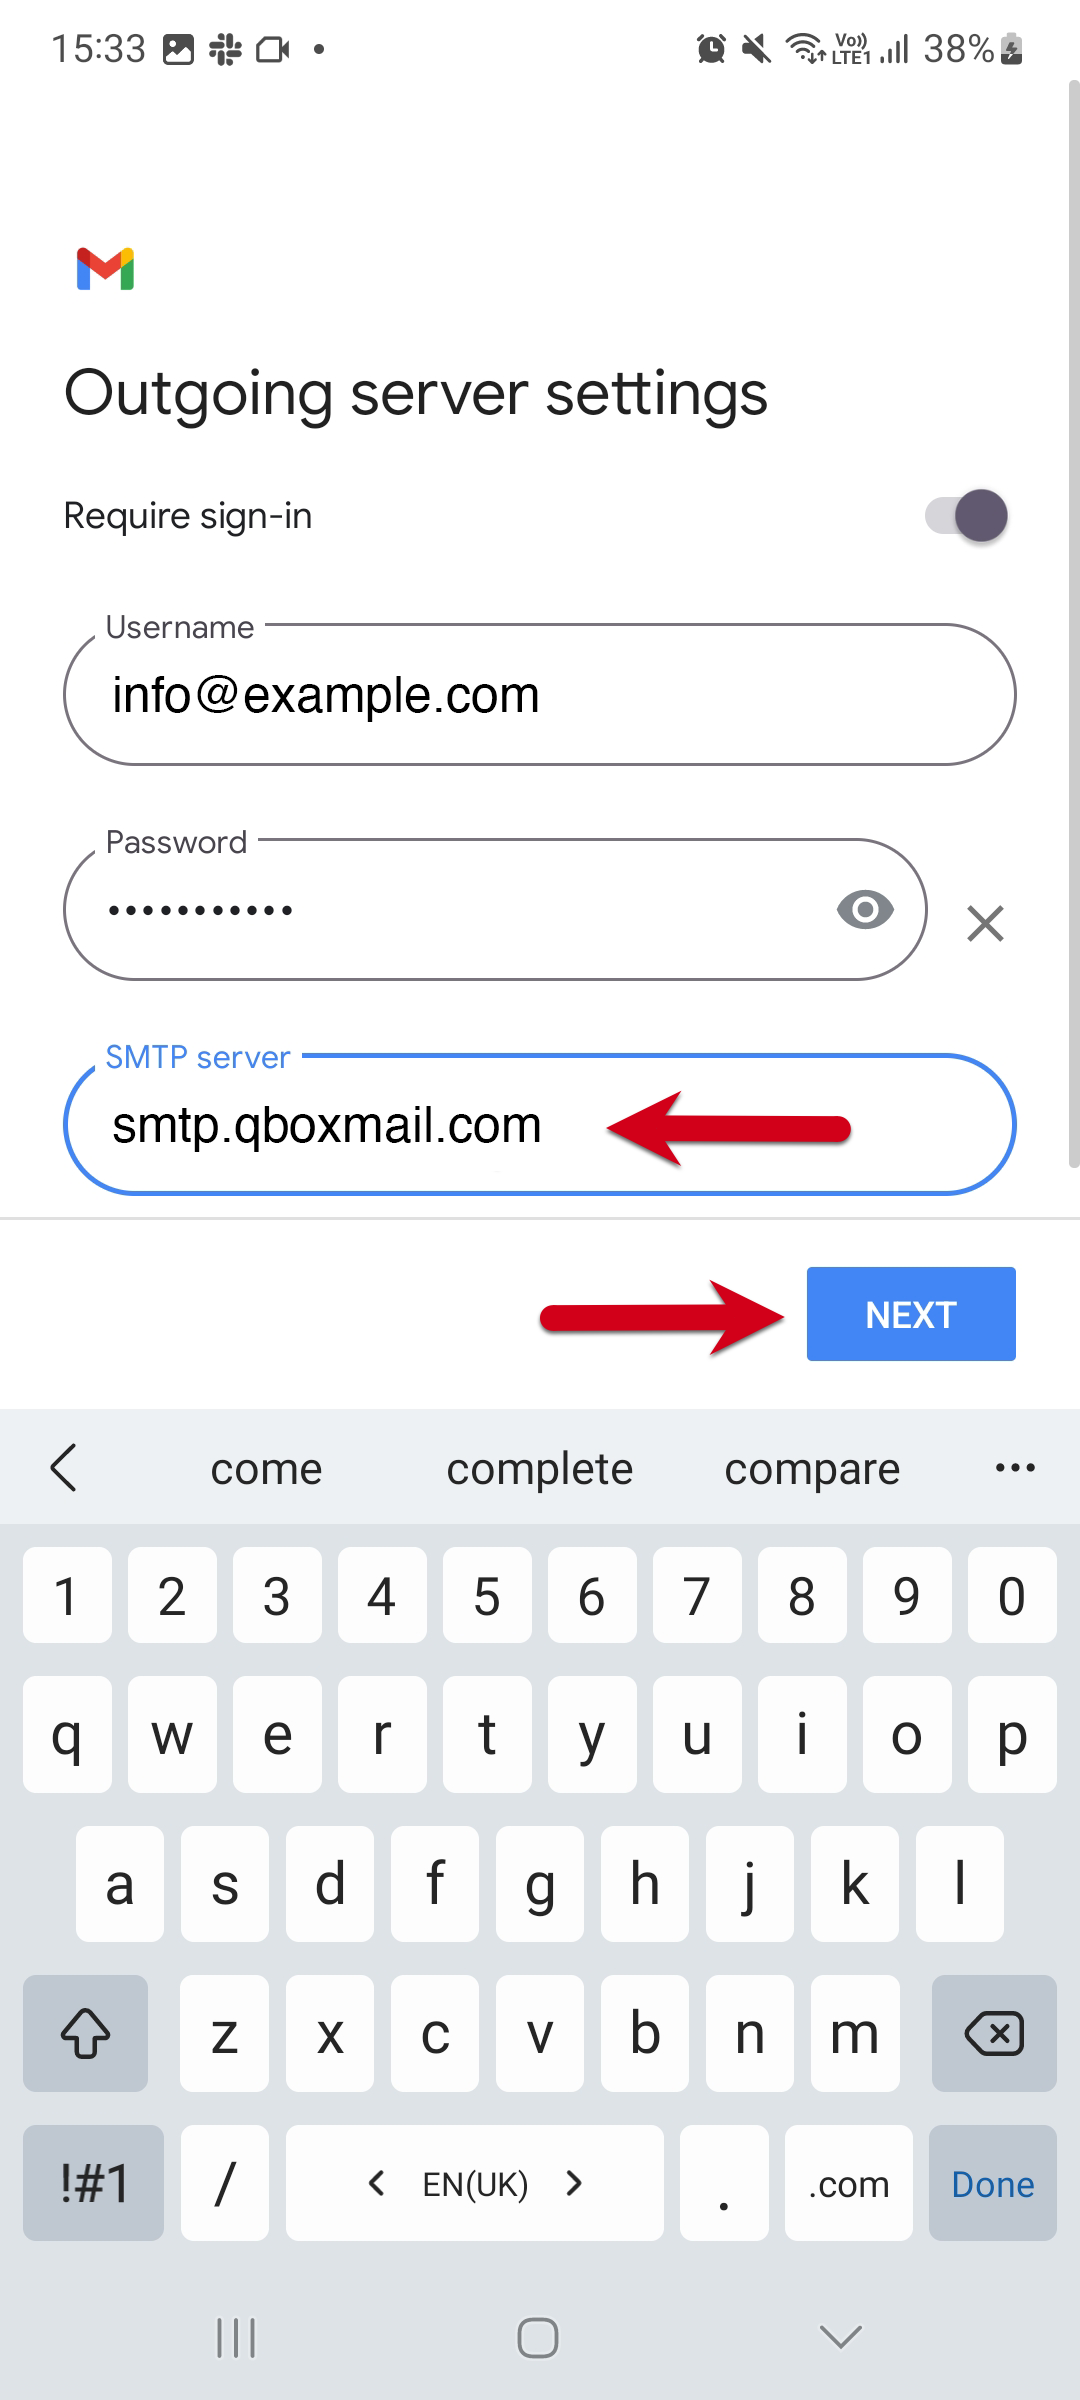
- Enter outgoing server Host Name bij SMTP server: smtp.qboxmail.com
Step 10
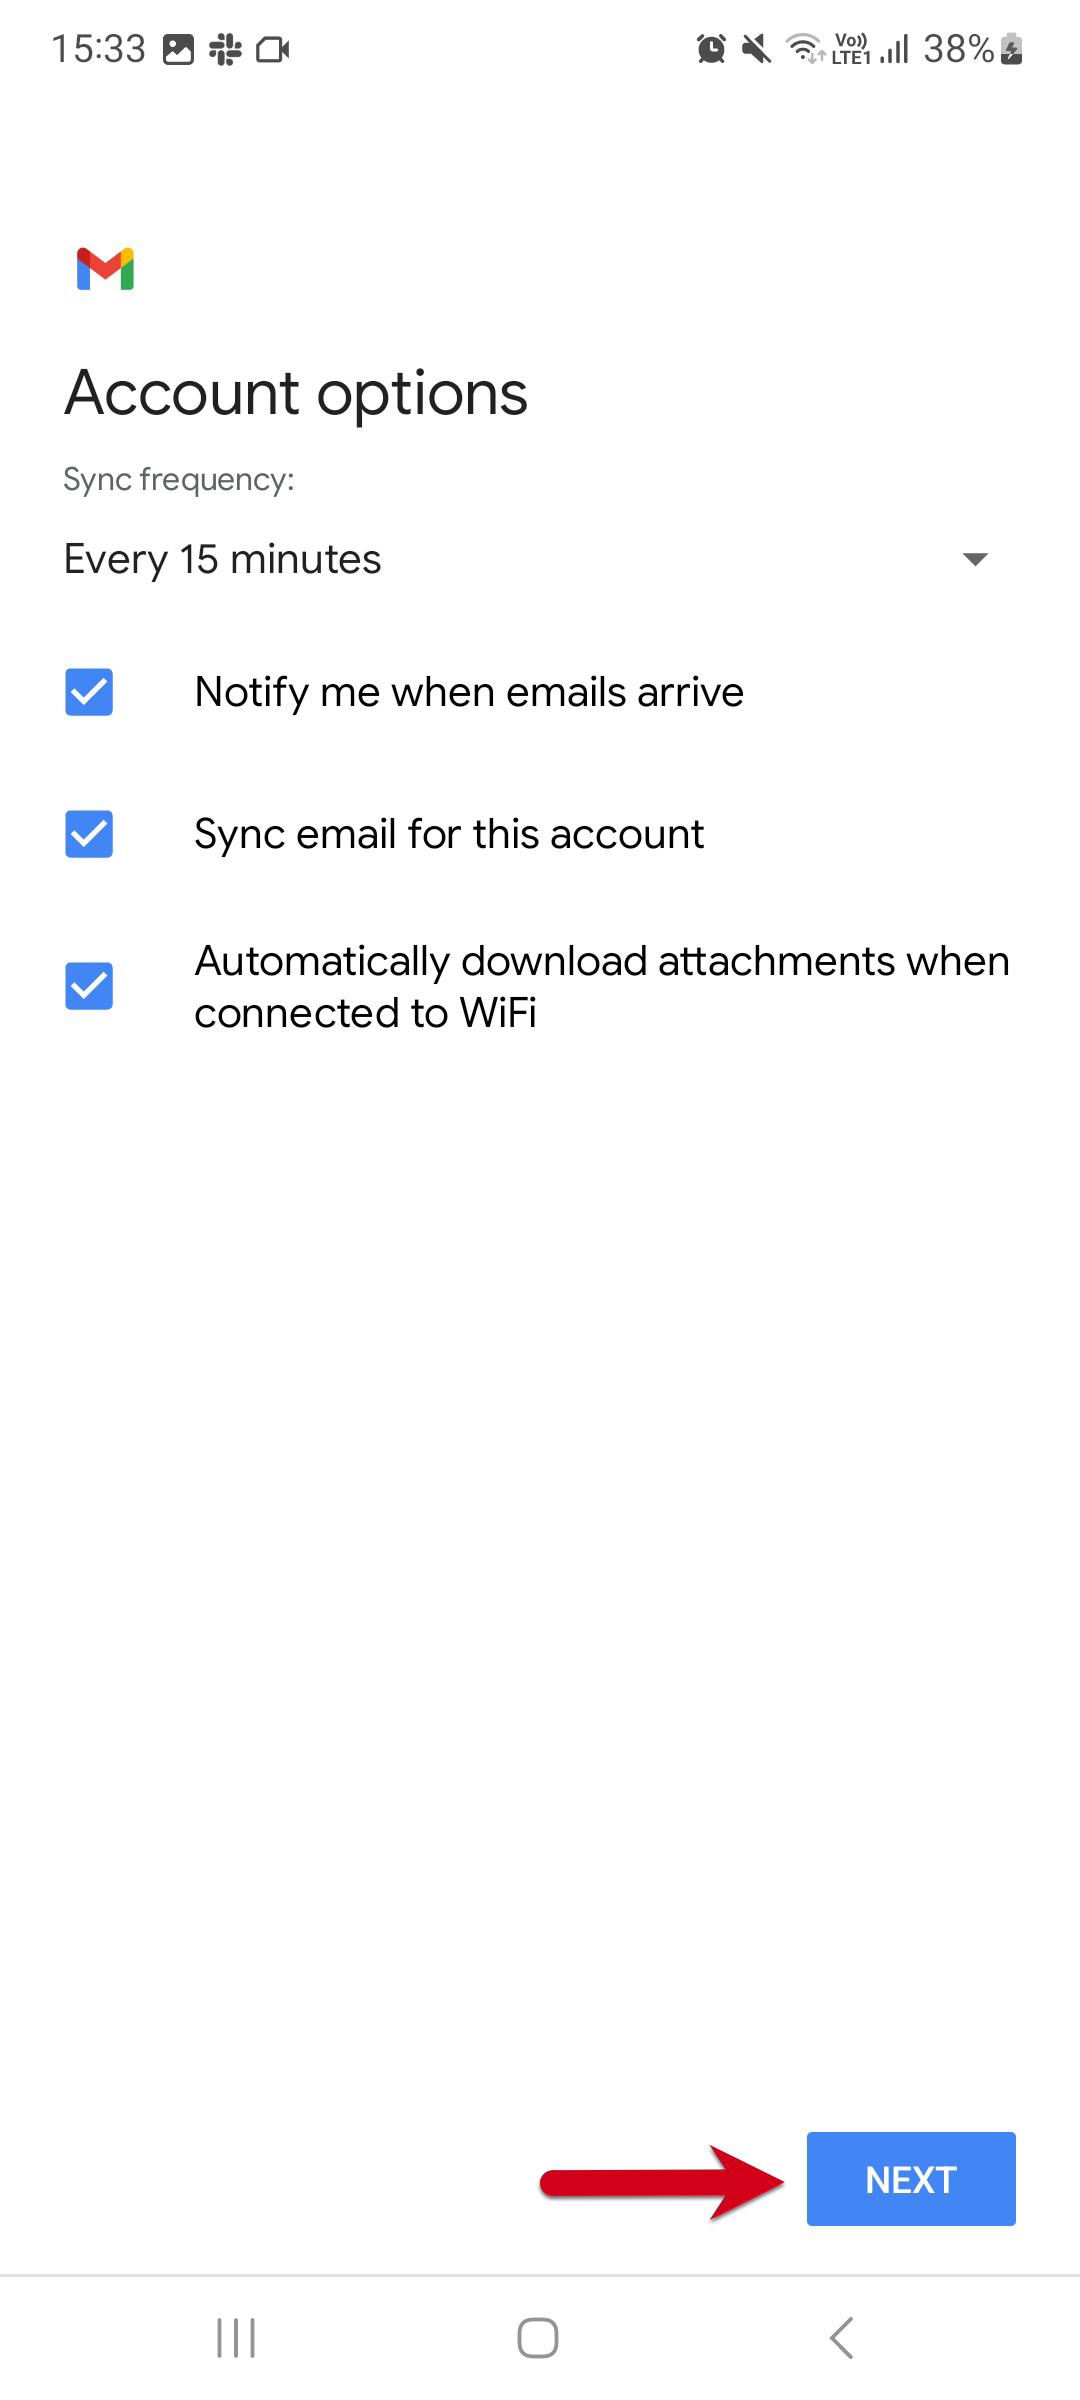
- Set your sync frequency preferences and any other account options as desired.
- Tap Next.
Step 11
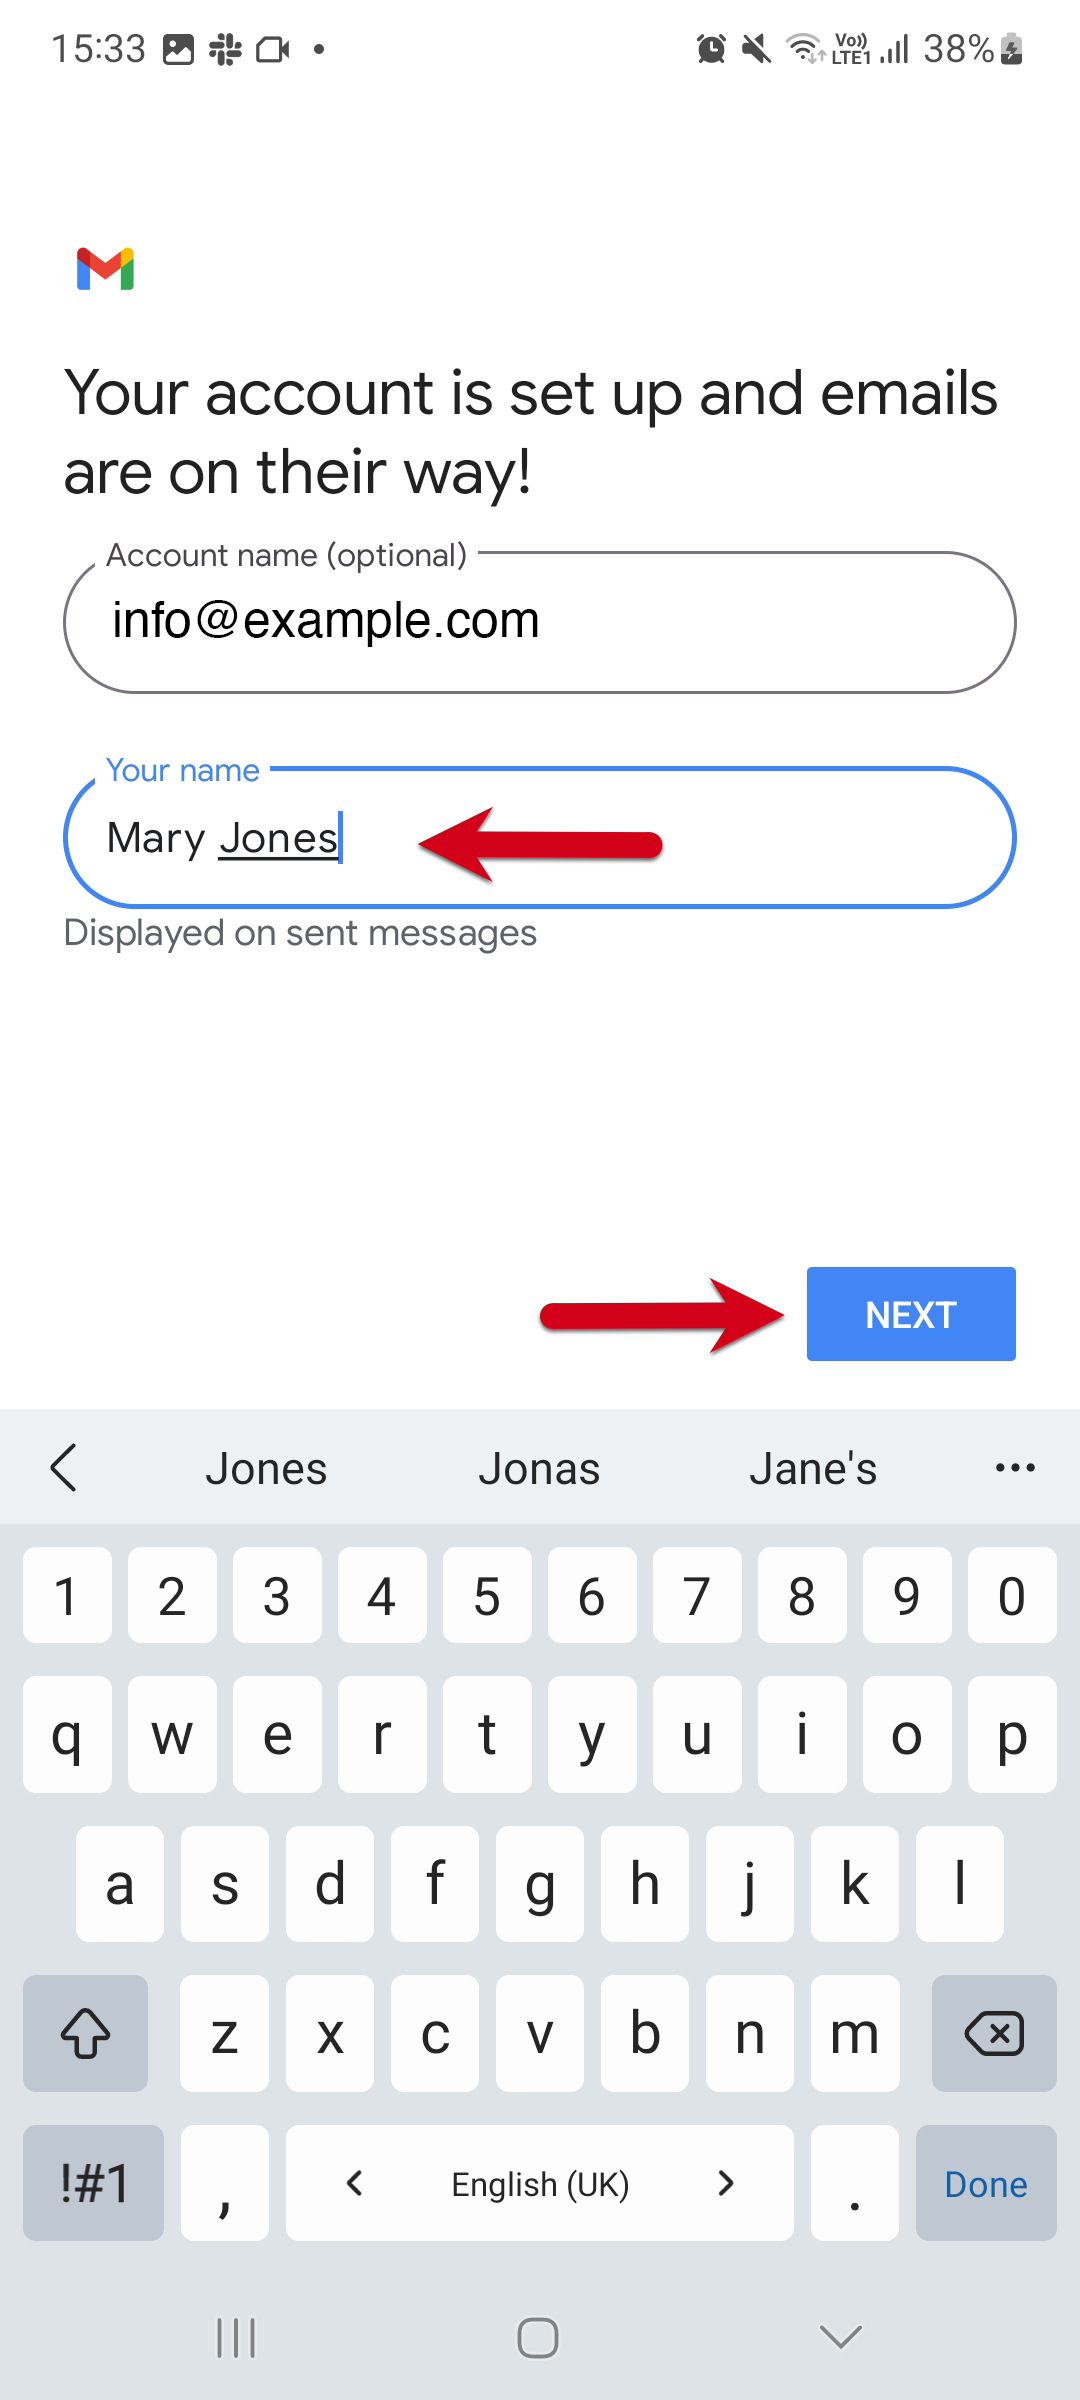
- Enter a name for the account to display on outgoing message.
- Tap Next to complete the setup.
Your device will automatically choose the correct security settings. If not, please use these settings:
- IMAP Port: 993
- IMAP Connection security: TLS
- SMPT Port: 465 (in case of problems, try port 25 or 587 with STARTTLS option)
- SMTP: Connection security SSL
Please visit the Gmail Help Centre for specific help with your Android device.
Still need help?
If you’re still having trouble setting up your email account or saving your email settings, please don’t hesitate to contact us for assistance. We’re here to help!